Showing posts with label Recycle. Show all posts

Tuesday, September 9, 2014

Joss: Curtains, remove the eye sore

The next item on the list of boat fixes was for me, what it needed most. The most hideous curtains I have ever seen in my life! This curtain is not only falling apart, but it is weird to start with. I had vinyl "wood" strips aligned vertically. And the best part is, the darker colored horizontal strips are completely plastic, they feel like a plastic tablecloth or shower curtain. So weird!

I just had to go. Being that it was one of the first things that you see when you walk in, there was no avoiding it. There was another curtain only 3 feet away from where the horrible curtain hang that was not as bad, it had green vertical stripes, but the green was much different from the green in the rest of the boat. I thought it would be best if they both matched, so I decided to make two new ones.

So I pulled it off and headed to the fabric store. I didn't buy fabric at the fabric store, because the only fabrics I liked were $16/metre! There was no way Im paying that much for boat curtains. I went home sad until I remembered a post I saw on Pinterest about crafts with drop cloths. Now, I'm not the type of person to re-purpose a drop cloth for the fun of it, but since it was the color I was looking for, and $13 total, there was no better choice. I drove to Home Depot and bought a drop cloth.

Making curtains the way I was doing it was nearly the easiest sewing project I have ever done!.

Materials:

Hooks to hand your curtain

Drop Cloth (or any other heavy fabric)

Sewing Machine

Fabric Scissors 

Pencil

Measuring Tape

Iron/ironing board

What I did:

I started by measuring the original curtains I added 1 inch to the vertical measurement to account for seams, and 3 inches to the horizontal measurement to account for seams because I was screwing it to the wall on one side I needed extra thick seams(normally just add 1 inch per side for 1/2 inch seams). 

Lay the fabric out on the floor. Measure and mark points with a pencil the size of the new curtain, connect the points with a straight line if you are not a super straight cutter (like me). Cut out the new curtain with fabric scissors. One huge benefit if you are using a drop cloth is that the sides already have seams, so in my case I only needed to make seams on two sides!


Next Iron your fabric how you plan to sew it. I needed 1/2 inch seams on the top for the hooks I was using so I folded 1/2 inch over ironed, and folded another 1/2 inch over and ironed. Since the bottom was already heamed I only needed to add 1 inch to my length. Pin the ironed fabric in place. Ironing is VERY important. You might not believe me, but ironing before sewing makes an item look much more professional. If you iron you are more likely to be asked "where did you buy that," then if you don't iron. Don't skip this step!


Next Sew the seams. In this picture I am sewing a piece that I took from one of the curtains that was used to attach the hooks. It is very unlikely that you will have this same piece, bit it was fairly easy if you are interested (I have no idea what its called or where to buy it). 

Once it is sewn that is basically it. I had to attach the hooks onto the top of the other one (not shown in the sewing picture above). Finally hang the curtain and  admire your handy work. 
Ahhh so much better! I am really happy with how the turned out, but next time I have free time (never) I might paint some stripes on the bottom to add a bit more pizazz!


If you need a tutorial on how to make other types of curtains try one of these:

Tuesday, September 2, 2014

Joss: Boat tiles and Nautical Rope Mirror

I have always loved all things nautical. It worked out that the first person I ever sailed with is now my husband. His parents own a Catalina 27. Its great, we mostly do just two hour afternoon trips in the bay, but we did our first overnight trip not too long ago. Since we have never taken an overnight trip before, we spent very little time inside the boat. Spending time inside motivated us to make some major updates to the boat.
This is a picture from our boat (of another boat)

There is a lot of work to do, among the regular maintenance that is required, but I started with the bathroom tiles because my husbands mom could not stand them.

Materials:

Ugly tiles

Martha Stewart Multi-Surface Paint

Painters tape

Paint foam roller and brush

Mirror

Hot Glue (or stronger glue if your mirror does not have a frame)

Nautical style rope

Sand paper (optional)

Rag and cleaning products

What I did:

Nautical Rope Mirror:

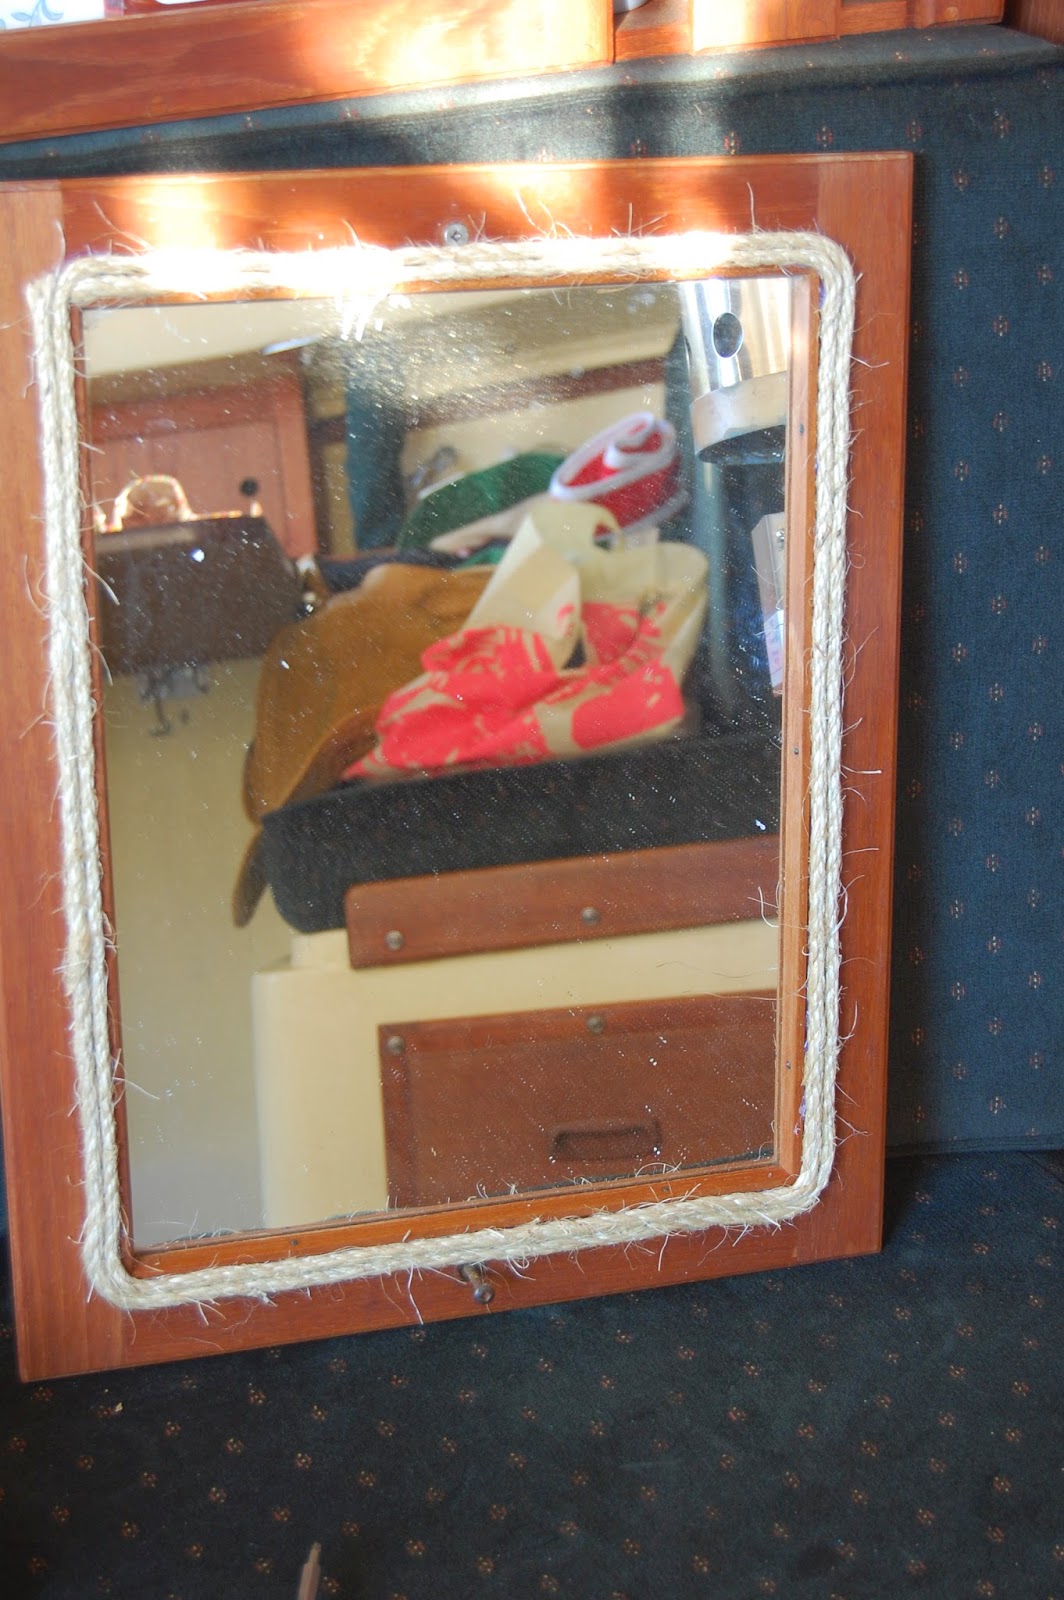
Not much required here. Hot glue rope around the mirror adding small sections of glue at a time and quickly placing the rope overtop (because it dries so quickly). I was only able to wrap three times because of the screws holding the mirror on the wall, but feel free to wrap as much as you want. Finish with the rope at the same place you started. 


Tiles:

Let me first note that this was for a small area with not too much traffic. I would use a different method for larger areas or more traffic. 

I forgot to take a before picture. Here is after one coat
you can see a bit of the dated flower design on the tiles. 
I started with a light sanding the tiles, nothing serious, just to be on the safe side. The product does not require it, but I wanted to be extra safe. I then cleaned the tiles with bathroom cleaner to remove any sanding dust, and other previous gunk that had built up over the past 20 years. Next tape the edges of the tiles to prevent painting the walls. 

Paint the tiles. I did my first coat with a brush to allow for a bit more coverage, and because the roller uses more paint and I only had a small bottle. Let the paint dry for 1-2 hours between coats as per instructions. Paint 1-3 more coats with a foam roller as required. I used white over cream tiles so 3 coats was enough, but I would suspect darker colors might only require 2 coats.  

Remove painter's tape. The paint can take up to a month to completely cure before you want to do any abrasive cleaning.

I tried to hide from the picture, but the bathroom is so tiny!


Tuesday, August 26, 2014

Sore Bum: Stool pillow top


A log stool is just a log if you don't spruce it up!

My log stool was hard and not that exciting until I added a pillow top to it!

Materials:


Stiff Fabric

Foam or Round Pillow

Long screw

Washer the bigger the better

Big Button

Strong glue

First determine how big to make the pillow. I made mine 1" wider than my stump so that it had some overhang. I had some old foam lying around so I cut that to the right size. I wanted the seat to be soft, so I cut an additional circle slightly smaller to go on top for extra padding. If you are using a pillow skip this step.

Making a pillow, I quickly learned, is a very simple task and does not require a pattern. Measure the diameter of the foam and add 3" total to the measurement to account for the 1.5" seam on each side. Fold your fabric in half and cut a circle out of your fabric with the new diameter. To cut a circle I tied a pencil on one end of a string and cut the sting to be the correct length. Hold the sting in the middle and draw a circle with the pencil all the way around keeping the sting tight. It was not 100% accurate for me, but it should be close enough that it will correct when you sew it together. 


Next measure the distance around the outside of the newly cut circles Add a few inches for 'safety' this will be the side panel. Measure the height of your foam/pillow. Mine was 6" tall but I wanted it to squish down inside my pillow case so I only cut 6" total (3" + 1.5" seams on each side). 

Fold the side panel stip in half, and in half again. Pin the corners (3 pins and 4 even sections). Next fold the one circle in half and pin the edges (do this both ways so there are 4 pins dividing the quarters). Match the pins so that the side panel stip is evenly dispursed around the circle. Make sure you do this right side to right side (so when you flip it inside out you see the good side of the fabric). 

Sew the circle on to the side panel strip. Do it again for the other circle but only sew 3/4 of the way around. 
Put the pillow or foam pieces inside and hand sew the opening closed. 

Take a long screw. Mine was 5" but that might have been over kill. Place the washer on the screw. This gives extra security so the fabric doesn't rip and pop over top of the screw. Place the pillow on the stump just how you want it. Find the middle of the pillow (I eyeballed it) and screw down through the pillow into the stup. Go down almost as far as you can so that when you sit down the screw doesn't poke you. Finally glue a big button on top of the screw to hide it.

Finished!

Tuesday, August 19, 2014

Rustic Cabin: Stool and side table

I don't know if its because I'm Canadian, British Columbian, or if its just me, but there is something fantastic about that deep in the woods Cabin. The kind where the owner says, my grandfather built this cabin and everything in it from the trees on the property. Then you cook the fish you just caught for dinner over a wood burning stove. That to me, sounds delightful!

I have a friend with a cabin like the one I am describing. Its near Egan Lake in BC, which is 1.5 hours to the closest town of under 2000 residents. Its really in the boonies! My friends dad built the entire house, and all the furniture inside. Its probably close to 500 sqft which is very squishy in -15 C  with 8 other people inside...But I love it so much! Unfortunately I can't find a good picture of that cabin, so I will have to update this post next time I go up there.

That being said I made some wooden stools that are very log cabin-esk.

Materials:

Large log stump

Skinny log stump

Sand paper (palm sander if available)

Large circular saw or chainsaw

spray varnish

3 Dowel Screw

What I did:

I started with two big log stumps and two skinny stumps from the pile in our back yard. You can get your from anywhere, I often see free fire wood on craigslist.

Brush off the sides with a coarse broom to get rid of any groseness and any loose bark. Then sand the top and bottom to remove any slime and to level out the surface.

Varnish all sides. I used spray varnish because it was much quicker and easier to get in the cracks. Trust me on this one, when I discovered varnish came in a spray can...my life was very simplified!

Next cut three even pieces from the smaller log. Keep in mind that a chair is about 19" tall. I wanted mine 21" for a bit of a higher stool so we cut the feet to be 3" tall.

Clean up and varnish the feet the same way as the main stool. Use the dowel screws to screw the legs into the side you choose to be on the bottom. Dowel screws are also revolutionary. If you have never used them before. Grip the middle with a pliers while you twist it into the foot. Only twist 1/3 of the way into the foot. Then flip it over and twist it into the stump using the foot as your handle. Once the stump side is tight the foot side will tighten up as well.

If you want a side table or a hard top stool thats it your done!

Pillow Tutorial coming soon...


Wednesday, April 24, 2013

Canadians: A Painting

Canadian's are not known for their patriotism, but we love things that are Canadian. We love outdoor gear like rain, snow, and other winter jackets. We love our landscape, like the mountains, the rivers, the lakes, and the Prairies. We love to hear how Americans stereotype us, and think we live in igloos, even though most of us have never even seen an igloo. We love outdoor adventures like hiking, biking, fishing, hunting out our back door, and others. We love our local animals, like Bears, Moose, Foxes, and Salmon (but not the Geese). And we LOVE hockey!

This was a project I did was about our local animals. Its a Black Bear! We are more known for our Grizzly Bears in this area, but they are much scarier, and not as common to see.

I chose to do a Black Bear because, for some random reason, I like to paint things for my younger brother. Its not that I don't like painting for my older brother, but his wife is 1 million times better, so it would be pointless. I told him I wanted to paint him something that I could paint a solid color, he wanted to be sure it was something manly, so we picked a Black Bear. It was fitting with the color of choice.

What I did:

It was a very easy craft! I looked up a few pictures of bears online so I could remember exactly what they looked like. I then covered a cheep dollar store canvas in news paper clippings. I cut out small pieces because I wanted it to be all words, and the news paper normally has a lot of pictures. You could also do this with book pages, but I was more willing to cut up my news paper than a perfectly good book.

I used a glue and water mixture to put the paper onto the canvas, then I sealed it on top with the glue and water. 

Lastly, I painted a picture of a Black Bear on top. If you are not good at painting, here is a cheater idea for this project. Print off a picture of a simple object(like the bear) in the right size. Then, cut out the picture slightly smaller than it is. Trace around the cut out onto the canvas, and paint inside. Since you cut is slightly smaller, it allows room to go out of the lines if there is a mistake. 

Finished!