Showing posts with label Beach. Show all posts

Wednesday, October 1, 2014

Whalecome: How to paint perfect letters

I have always thought that Whalecome is the funniest word ever. Since the first time I heard it that is (yes I realize its not a real word). It would not be funny for everyone I guess, just nautical lovers probably. I have wanted to make a pillow that says Whalecome for a long time now and I finally did! In fact. I made 2. One for Joss (the sailboat in other posts) and one for Ca-Sea-Ta (my in-laws other boat).


 You can't deny that is the cutest thing ever!


Materials:

Pillowcase or other surface

Paint

Print-out of picture/writing on any type of printer paper

Sharp Ballpoint Pen

Paintbrush

Sponge

Scissors

What I did:

I chose to put this stencil onto a pillow case, I have also done a similar project on a piece of fabric to make a type of flag. This can also be done on wood, or many other options. 

First cut out the large area with the scissors. The whale in this picture was easy to cut with scissors, but once I got to the letters is when I had to get creative. They were too skinny for my scissors, and my exacto knife ripped the paper so there was not a straight edge. 

Tape the word onto the fabric where you would like it to be so that it does not move. You might need to cut down the paper to include only the letters.

Use your pen to puncture holes in the paper. Once you are done the full word it should look something like this. 

Take the paper off and underneath should look something like this. The second time I did this project I used way less dots because I realized I did not need so many. Less dots = faster.

Consider taking the tape off slowly incase your pen died or a letter was missed for some reason.

Paint inside the dots. 

Finally use the sponge to paint inside the whale stencil. (I painted the whale first, order does not matter) A sponge will give the best results with the paper because you will be only dabbing the fabric. There is almost no chance that the stencil will run on the edges. 

Finished!

Tuesday, September 2, 2014

Joss: Boat tiles and Nautical Rope Mirror

I have always loved all things nautical. It worked out that the first person I ever sailed with is now my husband. His parents own a Catalina 27. Its great, we mostly do just two hour afternoon trips in the bay, but we did our first overnight trip not too long ago. Since we have never taken an overnight trip before, we spent very little time inside the boat. Spending time inside motivated us to make some major updates to the boat.
This is a picture from our boat (of another boat)

There is a lot of work to do, among the regular maintenance that is required, but I started with the bathroom tiles because my husbands mom could not stand them.

Materials:

Ugly tiles

Martha Stewart Multi-Surface Paint

Painters tape

Paint foam roller and brush

Mirror

Hot Glue (or stronger glue if your mirror does not have a frame)

Nautical style rope

Sand paper (optional)

Rag and cleaning products

What I did:

Nautical Rope Mirror:

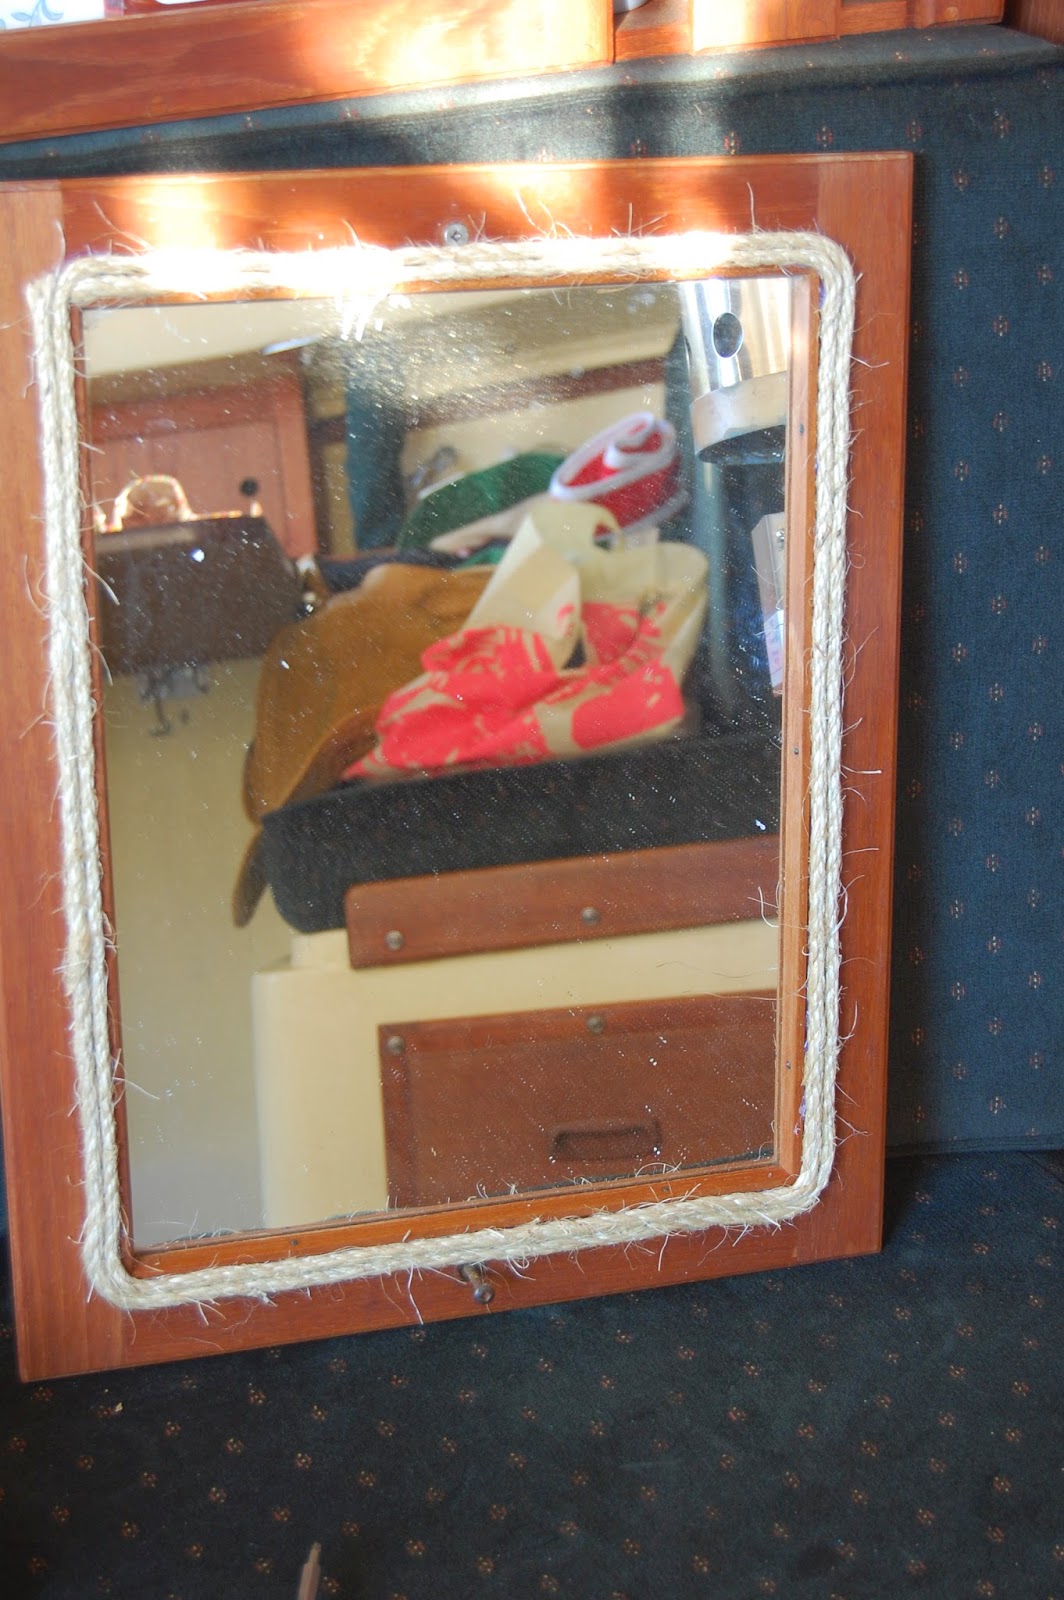
Not much required here. Hot glue rope around the mirror adding small sections of glue at a time and quickly placing the rope overtop (because it dries so quickly). I was only able to wrap three times because of the screws holding the mirror on the wall, but feel free to wrap as much as you want. Finish with the rope at the same place you started. 


Tiles:

Let me first note that this was for a small area with not too much traffic. I would use a different method for larger areas or more traffic. 

I forgot to take a before picture. Here is after one coat
you can see a bit of the dated flower design on the tiles. 
I started with a light sanding the tiles, nothing serious, just to be on the safe side. The product does not require it, but I wanted to be extra safe. I then cleaned the tiles with bathroom cleaner to remove any sanding dust, and other previous gunk that had built up over the past 20 years. Next tape the edges of the tiles to prevent painting the walls. 

Paint the tiles. I did my first coat with a brush to allow for a bit more coverage, and because the roller uses more paint and I only had a small bottle. Let the paint dry for 1-2 hours between coats as per instructions. Paint 1-3 more coats with a foam roller as required. I used white over cream tiles so 3 coats was enough, but I would suspect darker colors might only require 2 coats.  

Remove painter's tape. The paint can take up to a month to completely cure before you want to do any abrasive cleaning.

I tried to hide from the picture, but the bathroom is so tiny!


Friday, March 15, 2013

Photos: Why I dont take my own

Im going to start by saying: I like to think I can take pictures. But, really I'm lying to myself. Taking pictures is cool, and in the Vancouver area its the "Hypster" thing to do. Especially in the circles I run in. I'm pretty sure I have 10+ friends who are "professional" photographers. Not to say that they aren't good. Some of my closest friends are really good. I think they are at least. 

My profile picture is me holding a camera, because that cool and trendy. I didn't take the picture, so how do you know I'm a photographer. Sneaky I know.

There are times when I want to be a photographer. Not semi-professionally, I just want to take nice pictures of my life. I got a decent camera for Christmas one year. Its not amazing, but its not a point and shoot. Some times Ill take pictures, then other times, I just want to enjoy the moment. 

I am currently not in a photographer phase. I got engaged on an amazing date in Victoria  BC a few months ago. It was a beautiful day, and I brought my heavy camera around with me everywhere. I didn't take even one picture. 

In the end, weather I like taking pictures or not, does not make my pictures any good. I am a crafter, that doesn't mean that I'm good at all things artistic. I like to create things, but technology generally is not the easiest for me.

In short, I'm writing this blog today to say thanks to my brother. He, so far, has taken almost all of my pictures. He likes it, and is pretty good. He is not a professional, but really enjoys taking pictures, has so talent, has a really nice camera. These are some other random cool photos taken by +David Chung:

Photo credit: David Chung

Photo credit: David Chung

Photo credit: David Chung

Photo credit: David Chung