Showing posts with label DIY. Show all posts

Wednesday, October 1, 2014

Whalecome: How to paint perfect letters

I have always thought that Whalecome is the funniest word ever. Since the first time I heard it that is (yes I realize its not a real word). It would not be funny for everyone I guess, just nautical lovers probably. I have wanted to make a pillow that says Whalecome for a long time now and I finally did! In fact. I made 2. One for Joss (the sailboat in other posts) and one for Ca-Sea-Ta (my in-laws other boat).


 You can't deny that is the cutest thing ever!


Materials:

Pillowcase or other surface

Paint

Print-out of picture/writing on any type of printer paper

Sharp Ballpoint Pen

Paintbrush

Sponge

Scissors

What I did:

I chose to put this stencil onto a pillow case, I have also done a similar project on a piece of fabric to make a type of flag. This can also be done on wood, or many other options. 

First cut out the large area with the scissors. The whale in this picture was easy to cut with scissors, but once I got to the letters is when I had to get creative. They were too skinny for my scissors, and my exacto knife ripped the paper so there was not a straight edge. 

Tape the word onto the fabric where you would like it to be so that it does not move. You might need to cut down the paper to include only the letters.

Use your pen to puncture holes in the paper. Once you are done the full word it should look something like this. 

Take the paper off and underneath should look something like this. The second time I did this project I used way less dots because I realized I did not need so many. Less dots = faster.

Consider taking the tape off slowly incase your pen died or a letter was missed for some reason.

Paint inside the dots. 

Finally use the sponge to paint inside the whale stencil. (I painted the whale first, order does not matter) A sponge will give the best results with the paper because you will be only dabbing the fabric. There is almost no chance that the stencil will run on the edges. 

Finished!

Tuesday, September 23, 2014

A Globe: Holds Everything

I have loved maps and globes for a long time. I always loved pulling out the family atlas book and learning about countries I had never heard of. I also, for reasons unknow, have enjoyed many times looking at country and capital city names and  deciding if I could name my children those name. Is Juba (capital of South Sudan) a girls name or a boys name?
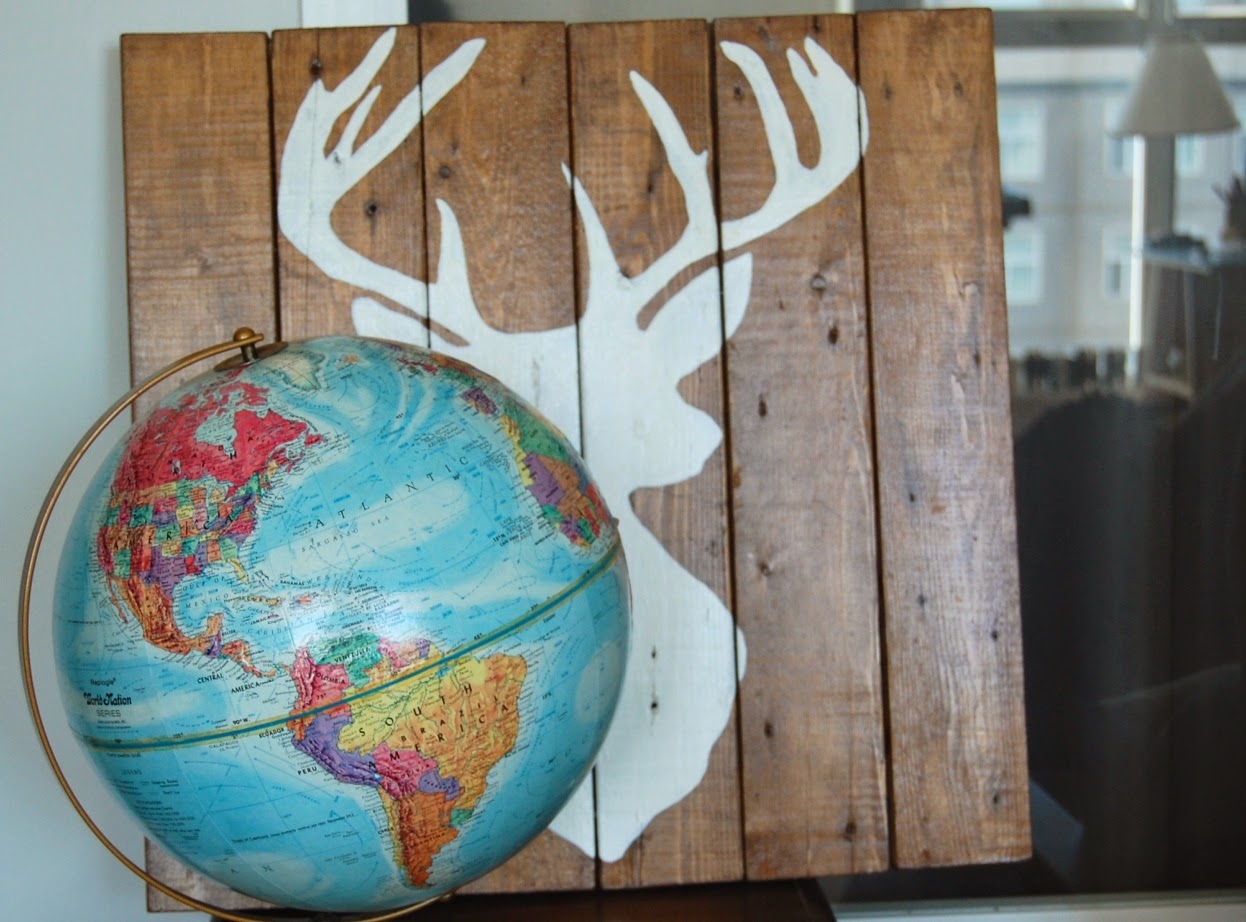
Though I do love to look at all the globes in Chapters and Homesense, I think I prefer the older style. I have one in my house right now (below) that looks like someone finger painted the water. Its all streaky. I love it! Thrift stores is my favorite place to get vintage globes. Plus they are much cheaper for the quality. 
I saw a bowl made from a globe on sale online and I knew I had to re-create it!

Materials:

Globe

Wooden Candle stand (or similar item)

Old Book

Rope/twine/cloth (or similar item)

Scissors/exacto knife

Hot glue + white glue

Varnish

Screw/screw driver (optional)

What I did:

Cut the globe in half. This is by far the most challenging part of the project. Work at it slowly with a sharp exacto knife of scissors. Have patience.

Once you open it the inside will look like this (below):

I had no idea what I was getting into. Notice the extra thick cardboard that was used to hold the seam together. Don't cut through it if you don't have it. I was able to pull the top off once I worked at it for a while.

You might want to note that I used the bottom half of the globe so that the words are not upside down ;)

Next add your base. Mine was wooden so I chose to screw the globe onto the base. If you don't have wood (or just don't like screws) feel free to glue it. Luckily there is a hole in the bottom of the globe to let you know the exact middle. No complicated measuring required.

Next cover the inside of the globe with pages from a book in collage style. I used the white glue to first hold the pages in place. Once all the glue from the pages is dry add two layers of varnish. You dont want to feel the book pages. Also this will help to make it safe for food (not waterproof though).

Finally wrap rope, twine, or a piece of cloth around the top to cover the raw edge. I felt three rows was enough. You might need to cover less if you had a cleaner opening than I did.

Finished!


Tuesday, September 16, 2014

Centre Pieces: Paper Flowers

One of my favorite things about paper flowers is that they never die! You can have them in any color you like, they don't need any water, and you never have to think about refreshing your table when guests come over. So handy!
For my wedding I was not particularly worried about the flowers wilting before the reception started. I decided to have paper flowers for two reasons. First off, when I learned how expensive flowers are I was not willing to spend that much! Also, and more importantly I love making everything by hand, and love the look of paper flowers, how cool is it to know that the Bride made EVERYTHING on the table!

Materials:

Paper. Heavier than copy paper, but not as heavy as card stock (I used 67lb paper)

Chopsticks (the cheap wooden ones from take-out)

Green Paint

Liquid Glue

Scissors

Paintbrush

What I did:

First, please note, that I based my flowers off This tutorial, but made some changes.


Cut out petals in approximately the same shape as the picture to the right. Cut some smaller, some more oblong, some larger, ect. Each flower will need approximately 10-14 petals. Feel free to fold the paper in half to cut out two at a time.


Next crumple up, and un-crumple all of the petals, so that when they are open again they are wrinkled.
The wrinkles of the petals allows them to look a bit more realistic, less like paper and a bit more like silk. It gives them some texture.

Paint the chopsticks green. Be sure to paint the whole chopstick because the top will likely be showing like in the picture below.

Place a small line of glue at the base (flat side) of one petal. You will be working from the centre of the flower to the outside, so the first petal you choose should be one that you want in the centre. 

Wrap the bottom of the petal(with the glue) around the chopstick(the fat end). depending on what type of flower you are going for will determine what angle you wrap the flower. I wrapped the petal around at about 40 degrees so that it was not too tight looking. 


Glue and wrap two more petals around the chopstick so that the three petals are evenly dispersed around the top of the chopstick forming the centre of the flower. 

Continue adding petals in the "windows" of the previous petals until you are satisfied with the size of your flower. With every subsequent layer increase the angle that you attach petal.

Once you have used up all your petals, or are satisfied with the number of petals stop adding more. Bend the petals out from the centre or at their tops so that they offer a more realistic look.


Finished!

Tuesday, September 9, 2014

Joss: Curtains, remove the eye sore

The next item on the list of boat fixes was for me, what it needed most. The most hideous curtains I have ever seen in my life! This curtain is not only falling apart, but it is weird to start with. I had vinyl "wood" strips aligned vertically. And the best part is, the darker colored horizontal strips are completely plastic, they feel like a plastic tablecloth or shower curtain. So weird!

I just had to go. Being that it was one of the first things that you see when you walk in, there was no avoiding it. There was another curtain only 3 feet away from where the horrible curtain hang that was not as bad, it had green vertical stripes, but the green was much different from the green in the rest of the boat. I thought it would be best if they both matched, so I decided to make two new ones.

So I pulled it off and headed to the fabric store. I didn't buy fabric at the fabric store, because the only fabrics I liked were $16/metre! There was no way Im paying that much for boat curtains. I went home sad until I remembered a post I saw on Pinterest about crafts with drop cloths. Now, I'm not the type of person to re-purpose a drop cloth for the fun of it, but since it was the color I was looking for, and $13 total, there was no better choice. I drove to Home Depot and bought a drop cloth.

Making curtains the way I was doing it was nearly the easiest sewing project I have ever done!.

Materials:

Hooks to hand your curtain

Drop Cloth (or any other heavy fabric)

Sewing Machine

Fabric Scissors 

Pencil

Measuring Tape

Iron/ironing board

What I did:

I started by measuring the original curtains I added 1 inch to the vertical measurement to account for seams, and 3 inches to the horizontal measurement to account for seams because I was screwing it to the wall on one side I needed extra thick seams(normally just add 1 inch per side for 1/2 inch seams). 

Lay the fabric out on the floor. Measure and mark points with a pencil the size of the new curtain, connect the points with a straight line if you are not a super straight cutter (like me). Cut out the new curtain with fabric scissors. One huge benefit if you are using a drop cloth is that the sides already have seams, so in my case I only needed to make seams on two sides!


Next Iron your fabric how you plan to sew it. I needed 1/2 inch seams on the top for the hooks I was using so I folded 1/2 inch over ironed, and folded another 1/2 inch over and ironed. Since the bottom was already heamed I only needed to add 1 inch to my length. Pin the ironed fabric in place. Ironing is VERY important. You might not believe me, but ironing before sewing makes an item look much more professional. If you iron you are more likely to be asked "where did you buy that," then if you don't iron. Don't skip this step!


Next Sew the seams. In this picture I am sewing a piece that I took from one of the curtains that was used to attach the hooks. It is very unlikely that you will have this same piece, bit it was fairly easy if you are interested (I have no idea what its called or where to buy it). 

Once it is sewn that is basically it. I had to attach the hooks onto the top of the other one (not shown in the sewing picture above). Finally hang the curtain and  admire your handy work. 
Ahhh so much better! I am really happy with how the turned out, but next time I have free time (never) I might paint some stripes on the bottom to add a bit more pizazz!


If you need a tutorial on how to make other types of curtains try one of these:

Tuesday, September 2, 2014

Joss: Boat tiles and Nautical Rope Mirror

I have always loved all things nautical. It worked out that the first person I ever sailed with is now my husband. His parents own a Catalina 27. Its great, we mostly do just two hour afternoon trips in the bay, but we did our first overnight trip not too long ago. Since we have never taken an overnight trip before, we spent very little time inside the boat. Spending time inside motivated us to make some major updates to the boat.
This is a picture from our boat (of another boat)

There is a lot of work to do, among the regular maintenance that is required, but I started with the bathroom tiles because my husbands mom could not stand them.

Materials:

Ugly tiles

Martha Stewart Multi-Surface Paint

Painters tape

Paint foam roller and brush

Mirror

Hot Glue (or stronger glue if your mirror does not have a frame)

Nautical style rope

Sand paper (optional)

Rag and cleaning products

What I did:

Nautical Rope Mirror:

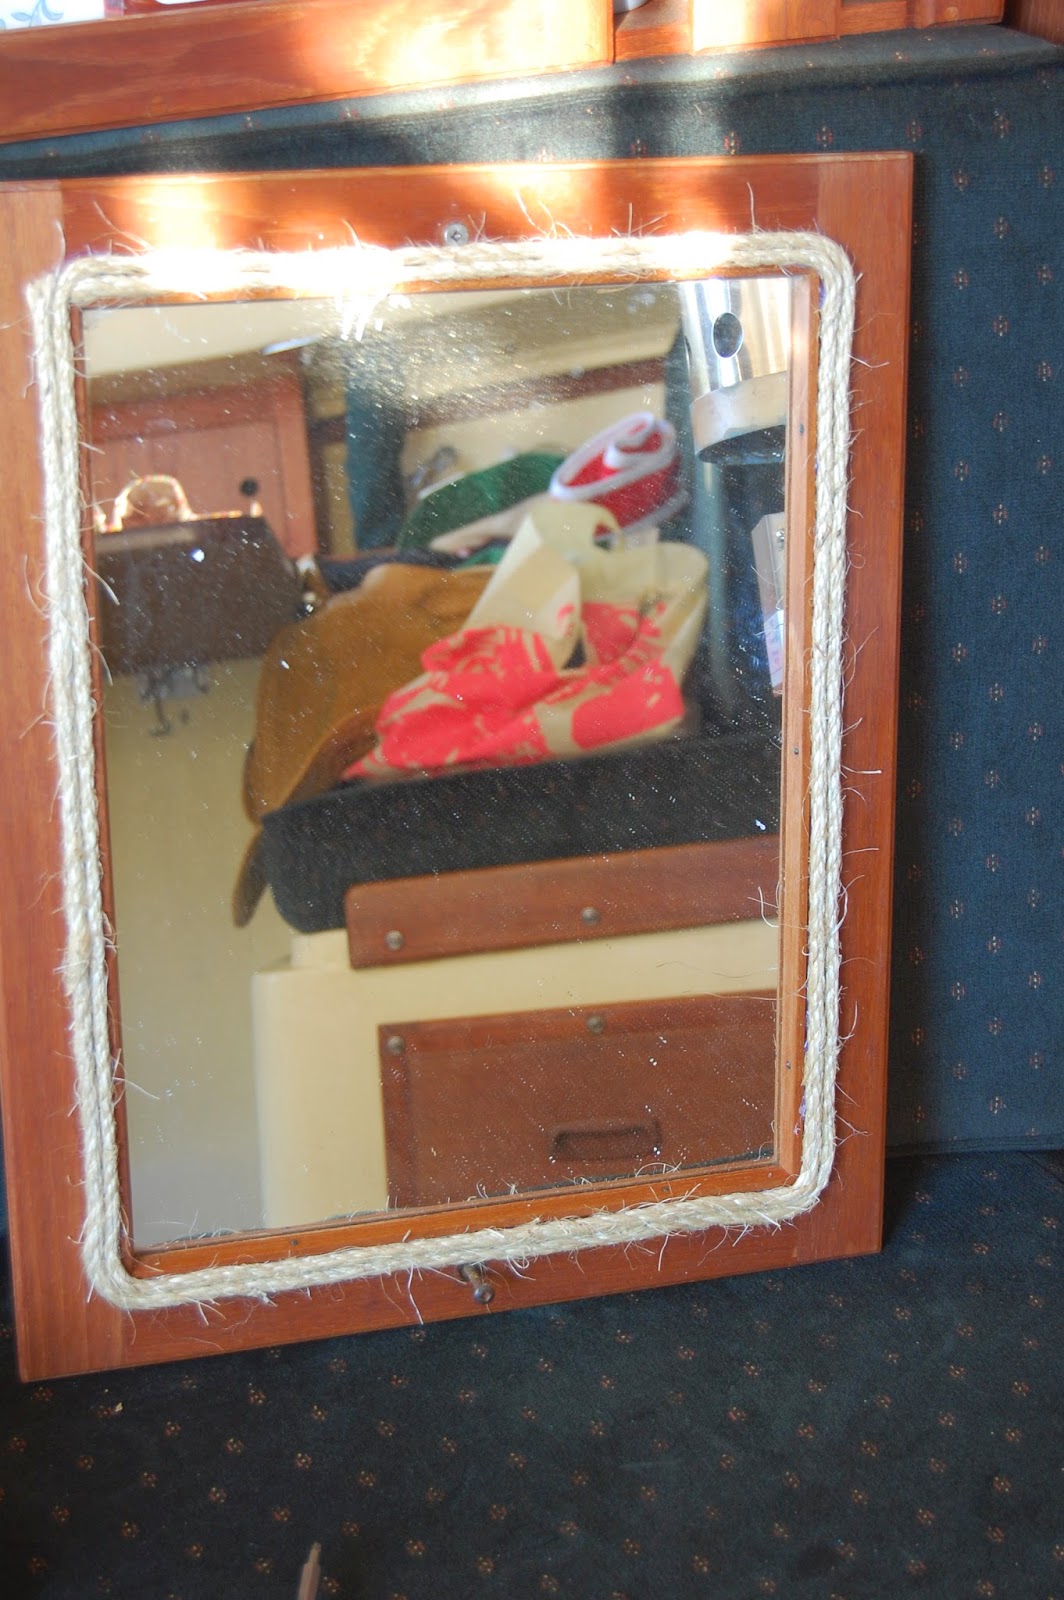
Not much required here. Hot glue rope around the mirror adding small sections of glue at a time and quickly placing the rope overtop (because it dries so quickly). I was only able to wrap three times because of the screws holding the mirror on the wall, but feel free to wrap as much as you want. Finish with the rope at the same place you started. 


Tiles:

Let me first note that this was for a small area with not too much traffic. I would use a different method for larger areas or more traffic. 

I forgot to take a before picture. Here is after one coat
you can see a bit of the dated flower design on the tiles. 
I started with a light sanding the tiles, nothing serious, just to be on the safe side. The product does not require it, but I wanted to be extra safe. I then cleaned the tiles with bathroom cleaner to remove any sanding dust, and other previous gunk that had built up over the past 20 years. Next tape the edges of the tiles to prevent painting the walls. 

Paint the tiles. I did my first coat with a brush to allow for a bit more coverage, and because the roller uses more paint and I only had a small bottle. Let the paint dry for 1-2 hours between coats as per instructions. Paint 1-3 more coats with a foam roller as required. I used white over cream tiles so 3 coats was enough, but I would suspect darker colors might only require 2 coats.  

Remove painter's tape. The paint can take up to a month to completely cure before you want to do any abrasive cleaning.

I tried to hide from the picture, but the bathroom is so tiny!


Tuesday, August 19, 2014

Rustic Cabin: Stool and side table

I don't know if its because I'm Canadian, British Columbian, or if its just me, but there is something fantastic about that deep in the woods Cabin. The kind where the owner says, my grandfather built this cabin and everything in it from the trees on the property. Then you cook the fish you just caught for dinner over a wood burning stove. That to me, sounds delightful!

I have a friend with a cabin like the one I am describing. Its near Egan Lake in BC, which is 1.5 hours to the closest town of under 2000 residents. Its really in the boonies! My friends dad built the entire house, and all the furniture inside. Its probably close to 500 sqft which is very squishy in -15 C  with 8 other people inside...But I love it so much! Unfortunately I can't find a good picture of that cabin, so I will have to update this post next time I go up there.

That being said I made some wooden stools that are very log cabin-esk.

Materials:

Large log stump

Skinny log stump

Sand paper (palm sander if available)

Large circular saw or chainsaw

spray varnish

3 Dowel Screw

What I did:

I started with two big log stumps and two skinny stumps from the pile in our back yard. You can get your from anywhere, I often see free fire wood on craigslist.

Brush off the sides with a coarse broom to get rid of any groseness and any loose bark. Then sand the top and bottom to remove any slime and to level out the surface.

Varnish all sides. I used spray varnish because it was much quicker and easier to get in the cracks. Trust me on this one, when I discovered varnish came in a spray can...my life was very simplified!

Next cut three even pieces from the smaller log. Keep in mind that a chair is about 19" tall. I wanted mine 21" for a bit of a higher stool so we cut the feet to be 3" tall.

Clean up and varnish the feet the same way as the main stool. Use the dowel screws to screw the legs into the side you choose to be on the bottom. Dowel screws are also revolutionary. If you have never used them before. Grip the middle with a pliers while you twist it into the foot. Only twist 1/3 of the way into the foot. Then flip it over and twist it into the stump using the foot as your handle. Once the stump side is tight the foot side will tighten up as well.

If you want a side table or a hard top stool thats it your done!

Pillow Tutorial coming soon...


Thursday, July 31, 2014

Bridesmaid bouquets: Paper Flowers


I think, after a year break it is time to start posting about wedding crafts. Since crafting is my hobby anyhow, having a DIY wedding was not only the obvious choice, but was no extra work. I simply replaced my personal crafting time with my wedding crafts. These crafts were more redundant than previously, but I had a bit more motivation to work hard, so it balanced out in the end.

Materials:

Light colored Paper about 1 page/2 flowers (anything less heavy than cardstock, but more heavy than copy paper will do). I used cream

Dark colored Cardstock Paper (I actually used the paper kids make school projects on because it was the only navy paper I could find). The heavier the better

Floral Wire

Hot glue or white glue (I used both)

Scissors

Pliers (or just a pencil will do)

What I did:

I actually followed This tutorial on the Elli blog and made a few of my own variations. She called them roses, but I chose them because I thought they looked like poppies which is what I was going for. 

Cut out TONS of petals in the shape of the picture to the right.. Cut them free hand because you do not want them to all be the same. Vary width, height, and shape if you like. I folded my paper in half and cut two petals at one time. Cut three small slits in the bottom just like the black lines on the picture. Fold the sides over the middle and glue them in place (this is later referred to as the platform). The petal should start to form a curvichure when you do this. I used white glue for this so there was no bump. 

Once the glue on the petals has dried it is time to start to put them together. Start with 3 or 4 of your smaller petals. Arrange them in a circle and use white glue to glue the platforms together one on top of another. Use another 5-4 of your larger petals and glue their platforms underneath. Make sure to stager the petals when you arrange the outer ones so that they are between the inner petals. Continue adding petals staggered to the outside until you are pleased. I used about 6-10 petals/ flower depending on the shape and size.

Next cut 1.5" and 2.5" diameter circles out of the dark paper. Cut slits in the circles from the outside edge to the centre as thin as you can go (mine were about 2mm).  The slits should go 3/4 of the way to the centre. so there is a small uncut spot in the middle. Curl the slits around a pencil or chopstick so they resemble a small bowl. Finally glue the smaller one inside the bigger one. This will be the centre of your flower.


Twist the top of your floral wire 1-2 times around your pliers or pencil and fold that section over so that it creates a platform. Hot glue the flower petals onto the platform. Then use hot glue to place the centre piece inside the newly assembled flower. Finally cut a small cloud shape out of your lighter paper (the same as the petals). Poke a hole in the centre with the floral wire and slide it up the floral wire and hot glue it onto the very bottom to cover up the floral wire platform. 

Ta Da! Beautiful flowers that never wilt!


Wednesday, April 24, 2013

Canadians: A Painting

Canadian's are not known for their patriotism, but we love things that are Canadian. We love outdoor gear like rain, snow, and other winter jackets. We love our landscape, like the mountains, the rivers, the lakes, and the Prairies. We love to hear how Americans stereotype us, and think we live in igloos, even though most of us have never even seen an igloo. We love outdoor adventures like hiking, biking, fishing, hunting out our back door, and others. We love our local animals, like Bears, Moose, Foxes, and Salmon (but not the Geese). And we LOVE hockey!

This was a project I did was about our local animals. Its a Black Bear! We are more known for our Grizzly Bears in this area, but they are much scarier, and not as common to see.

I chose to do a Black Bear because, for some random reason, I like to paint things for my younger brother. Its not that I don't like painting for my older brother, but his wife is 1 million times better, so it would be pointless. I told him I wanted to paint him something that I could paint a solid color, he wanted to be sure it was something manly, so we picked a Black Bear. It was fitting with the color of choice.

What I did:

It was a very easy craft! I looked up a few pictures of bears online so I could remember exactly what they looked like. I then covered a cheep dollar store canvas in news paper clippings. I cut out small pieces because I wanted it to be all words, and the news paper normally has a lot of pictures. You could also do this with book pages, but I was more willing to cut up my news paper than a perfectly good book.

I used a glue and water mixture to put the paper onto the canvas, then I sealed it on top with the glue and water. 

Lastly, I painted a picture of a Black Bear on top. If you are not good at painting, here is a cheater idea for this project. Print off a picture of a simple object(like the bear) in the right size. Then, cut out the picture slightly smaller than it is. Trace around the cut out onto the canvas, and paint inside. Since you cut is slightly smaller, it allows room to go out of the lines if there is a mistake. 

Finished!


Monday, April 15, 2013

Earrings: The Shiny Gold Shirt

My Brother is one of those guys who is so cool he can get away with anything. Right now, for instance, he has a greasy short pony tail, and bobby pins back his bangs, but he is still the coolest kid. He is the kinda person that sets trends, though I hope others are smart enough not to follow the pony tail trend. If he starts wearing baggy cargo pants, so do all the kids in his fan club. I really like him, he is a really nice, caring, hilarious, fun guy, but he can be a bit odd at times. Right now he is a folk singer song writer. His group is called Bronson and the Angels. However, he was not always a musician.

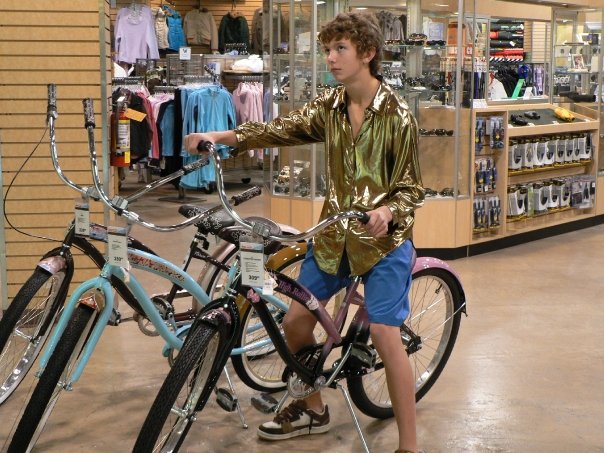
My Brother used to be really into basketball. He was super good and played for our provincial team! During that time, being the high school jock that he was, he was invincible in his coolness factor. I think he was in grade 9 or 10 when he went on a summer tournament to San Francisco. He wanted to make a statement at this tournament. He found the most intense gold shiny shirt at Value Village (thrift store), so he decided to wear it...everyday. This shirt made a statement for sure! It was probably a really nice shirt wear to the disco if you were over the age of 50 20 years ago. But, in the 21st century, it was not popular amongst high school boys.

I'm not sure if he still has the shirt tucked away in a safe keeping box somewhere, but I have not seen it in the last 5 years. However, when I was looking through my mom's button box, I came across two buttons from the shirt that had the same fabric on them. Though I would not wear the shirt now, I think the fabric is nice in small button sized quantities. So I decided to make them into earrings.

What I did:

This project probably took me less than 5 min. The buttons were shank style buttons, so they had a loop on the back. I took my pliers and cut the loop off so they would lie flat, this left a messy hole in the back, but that didn't matter. I then took some craft earring studs, and glued them onto the back of the button. I let the glue dry over night to be sure it was good and secure. I wore them the next day! Presto!


Wednesday, April 10, 2013

Wine Bottles: I love to Recycle

The Truth is, I like to Recycle. I'm not a recycle fanatic or anything, but I due value recycling.

I think my room mates have a different opinion about recycling than I do. I usually take the garbage and recycling out most weeks to be collected, and it can be a bit of a struggle. I'm not sure if they don't know, or if they just don't care, that the cardboard needs to be flattened, the jars need to be rinsed, the paper needs to come off, ect. But really I don't mind the extra 5 min to clean it all up. That's not really the hard part for me, the part that bothers me the most is what people DON'T recycle. When I take the garbage out and find plastic containers, to-go cup lids, paper, plastic bags, cardboard boxes, and so many other things that could be recycled in the garbage, that rubs me the wrong way. I usually pick out the things on the top of the garbage, but I don't really want to dig down into the garbage to pull everything out. Especially since we don't have a compost so there is rotting food in our garbage. I also am passionate about compost, but that's another story.

I would like to to be clear that I am not a nag when it comes to Recycling. At least not yet, or not with my current room mates. The odd time I will casually mention that certain things can be recycled, or that they need to be cleaned a specific way. However, this very rare since my room mates are not usually home when I take out the garbage and recycling.

The one thing I like more than recycling, is reusing or re-purposing, or (the new trendy word) up-cycling. I saw a craft on Pintrest, that was actually from Etsy, and decided to make it my own.

What I did:

I first spray painted the bottles with two coats of a special glass paint, so that my paint would not chip off later. I then made some chalk paint: 2 Tbs fine tile grout mixed with 1 cup craft paint. I wanted to be able to write what ever I wanted on the bottles, which is why I used chalk paint. The chances of me forgetting what type of flower I put in them is very high, this way I can write on the bottles and remember. 

After the chalk paint dried I twine wrapped the bottles. I wanted them to all be different so I wrapped different amounts. To Twine wrap all you need is a ball of twine and some glue and water mixture(just thin out the glue so its the consistency of Mod Podge). Simply brush the glue mixture onto the bottle and wrap the twine around the bottle. I always leave about 2 inches extra at the start in case it slides around a bit, then at the end, I can cut it to the correct length after it is dry. After the first two times around the twine doesn't move very easily so its actually very quick. 

I am going to put them on my kitchen window sill.

Wednesday, April 3, 2013

Stain Glass Windows: Its Like Home Church

This project is probably one of my favourites. It was such a rare opportunity, that I don't think anyone else could have such a thing. I was in the right place at the right time.

My church was doing some renovations, and my Dad and Uncle were in charge. Our church sanctuary (where the Sunday morning service is held) had stain glass windows on both of the side walls. Since, due to previous renovations, one of the side walls was actually an interior wall, the windows were going to be taken out to be replaced with a simple flat wall.  As soon as I heard this, I asked my Uncle if I could have the windows. Thankfully our church had no use for them, so one day after the Sunday service my Dad loaded two windows in the back of his truck to take home.

They were a lot different than what I expected when I received them. I was expecting a window with a small simple, but as you can see in the picture, that's not what I got. I had to change my plans a bit, but I think it worked out in the end.

Photo by David Chung

What I did:

Photo by David Chung
I started by sanding down all the wood. There were layers upon layers of hideous 80's church color oil based paint, so it took a long time. I then tapped up the windows with painters tape so that I didn't get paint on the glass when I painted.

I was hoping for a beachy/vintage look so I wanted a lot of the wood grain to be showing. To do this I added some leftover white paint to my clear varnish. I painted the whole thing with the faintly white varnish. I liked the effect on the wood after the first coat, and didn't want it any whiter, so I used a different un-tinted can of varnish for the second coat. After the varnish dried for two days I took off the tape, and scraped all the dirt and old paint splatters off the windows.

Photo By David Chung
There was not a lot of steps, but the sanding took forever, so it felt a lot harder than it was. I also later found out that the windows are fake stain glass and not real. It looks the same to me in the end.


Wednesday, March 27, 2013

Window Shutters: When your blinds just wont cut it

I hate blinds. I especially hated them when I was a kid. In my parents old house we had Venetian Blinds, which are the skinny metal blinds that were probably popular in the 80s and 90s. I think I hated them for a number of reasons.

Photo by David Chung
First of all, as a teen, the cool thing to do is to sleep till noon in the summer and on weekends. Blinds do not keep enough light out of the room to sleep until noon. You need to have curtains if you want to keep a substantial amount of light out. I'm sure there is a logical reason, that I have yet to discover, why a person would want both curtains and blinds. In my mind they serve the same purpose, why have both. Since my parents made the choice for blinds, which are not effective at light blocking, I didn't like them.

Another reason I don't like blinds, is because of the amount of dust they collect, and the difficulty to clean them. When I was a child I cleaned my blinds when I would get in trouble. I was a bit odd that way. I didn't clean them as a punishment, I cleaned them out of guilt. I would get in trouble from doing something that I knew was wrong, and I would just feel so guilty, that I would go to my room and clean my blinds(and other parts of my room). Now, looking back, I wonder if I was subconsciously trying to get back into my parents good books. As a result, I don't like blinds now, probably because I associate them with getting in trouble.

Photo By David Chung
Finally, I don't like blinds, because they are hard to use. I moved to a new place when I was about 16. I was not a weak 16 year old girl, I was unusually tough. However, the first time I tried to open my blinds, I actually couldn't do it. I had to have my brother come into my room, and pull on the cord as hard has he could,  just to open my blinds. I don't know if they were stuck, or the inside parts were rusty, but never the less, I could not open them. There are many other frustrating time I have had with broken blinds, such as when you pull on the sting only one side goes up(which is why I cant open the blinds in my room right now), or you  try to lower them and everything is too tangled to figure out what happened, and other annoying things.

As a result, when I moved into another room in my parents house, I immediately took down the blinds, and started to look for a solution  One day shortly after, my Mom came home with four random shutters from an antique store.  We decided they would be my new window coverings. To be honest most of this was not completely my project, but my dad's, because I cant use the table saw.
Photo by David Chung

What I did:

I started by giving the shutters a bit of character. I sanded the corners and some of the slats to give it a bit more of a worn look. I painted the blue one because it was red originally, but I didn't need to paint the others because they matched the colours of my room.

My dad had to build a frame around my window to hang the shutters on, because the window didn't have a frame to start with. I painted and sanded parts of that as well so that it matched the shutters.

We put small hinges between the two shutters so that they would fold in half. Then, we put larger hinges onto the shutters and the frame, so that the shutters would open off the window. 

The project was not particularly complicated in the end, it just took some time trying to figure out which direction to put the hinges on, so that it would open properly. 
Photo by David Chung